Die Buchhaltung ist der Teil eines ERP-Projekts, den niemand falsch machen will.
Wenn hier etwas durchrutscht, merkt man es schnell: Berichte stimmen nicht, Steuervorschriften greifen nicht oder das Finanzteam muss endlos manuell nacharbeiten, um Einträge zu korregieren.
Mit Odoo lässt sich das vermeiden – solange die Einrichtung von Anfang an richtig gemacht wird. Dieser Leitfaden zeigt Ihnen Schritt für Schritt, wie Sie Ihre Daten vorbereiten, das System konfigurieren und sicherstellen, dass alles vom ersten Tag an reibungslos läuft.
Hinweis: Dieser Leitfaden stellt keine Rechts- oder Steuerberatung dar. Für Fragen zur Einhaltung gesetzlicher Vorschriften wenden Sie sich bitte an Ihren Steuerberater oder Rechtsexperten.
Buchhaltungsdaten vorbereiten
Bevor Sie mit der Konfiguration beginnen, sollten Sie zunächst einige Grundfragen klären.
Die Basisdaten bestimmen die Struktur Ihres Systems. Je sauberer sie am Anfang aufgesetzt wurden, desto leichter wird alles Weitere.
Diese Eckdaten sollten Sie im Voraus festlegen:
- Ihr Kontenrahmen (Kontonamen, Codes, Typen, Steuerzuordnungen)
- Klare Übersicht über Steuersätze und steuerliche Meldevorschriften, am besten mit Ihrem Steuerberater abgestimmt
- Infos zu Bankkonten, Zahlungsanbietern und Abgleichprozessen
- Lokale Anforderungen (Berichte, Steuerpositionen, Digitalisierungsoptionen)
- Legen Sie fest, ob Sie Mehrfirmen-, Mehrwährungs- oder Kostenstellenbuchhaltung einsetzen wollen
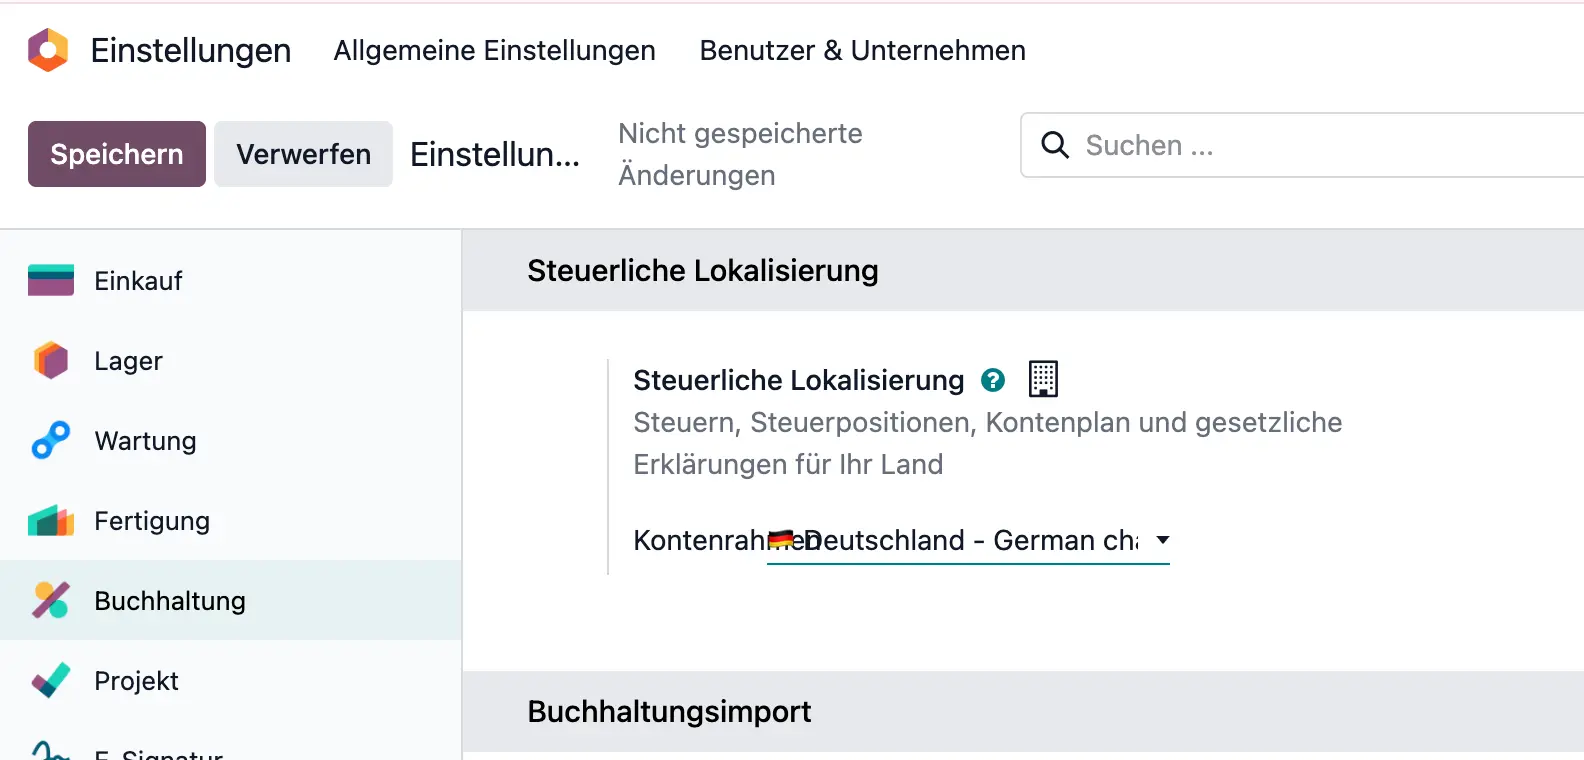
Tipp: Installieren Sie gleich zu Beginn das richtige Lokalisierungspaket (z. B. SKR03 oder SKR04 für Deutschland).
Odoo Buchhaltung in 6 Schritten installieren
Egal, ob Sie gerade erst mit Odoo anfangen oder eine frische Datenbank einrichten, folgen Sie diesen sechs Schritten:
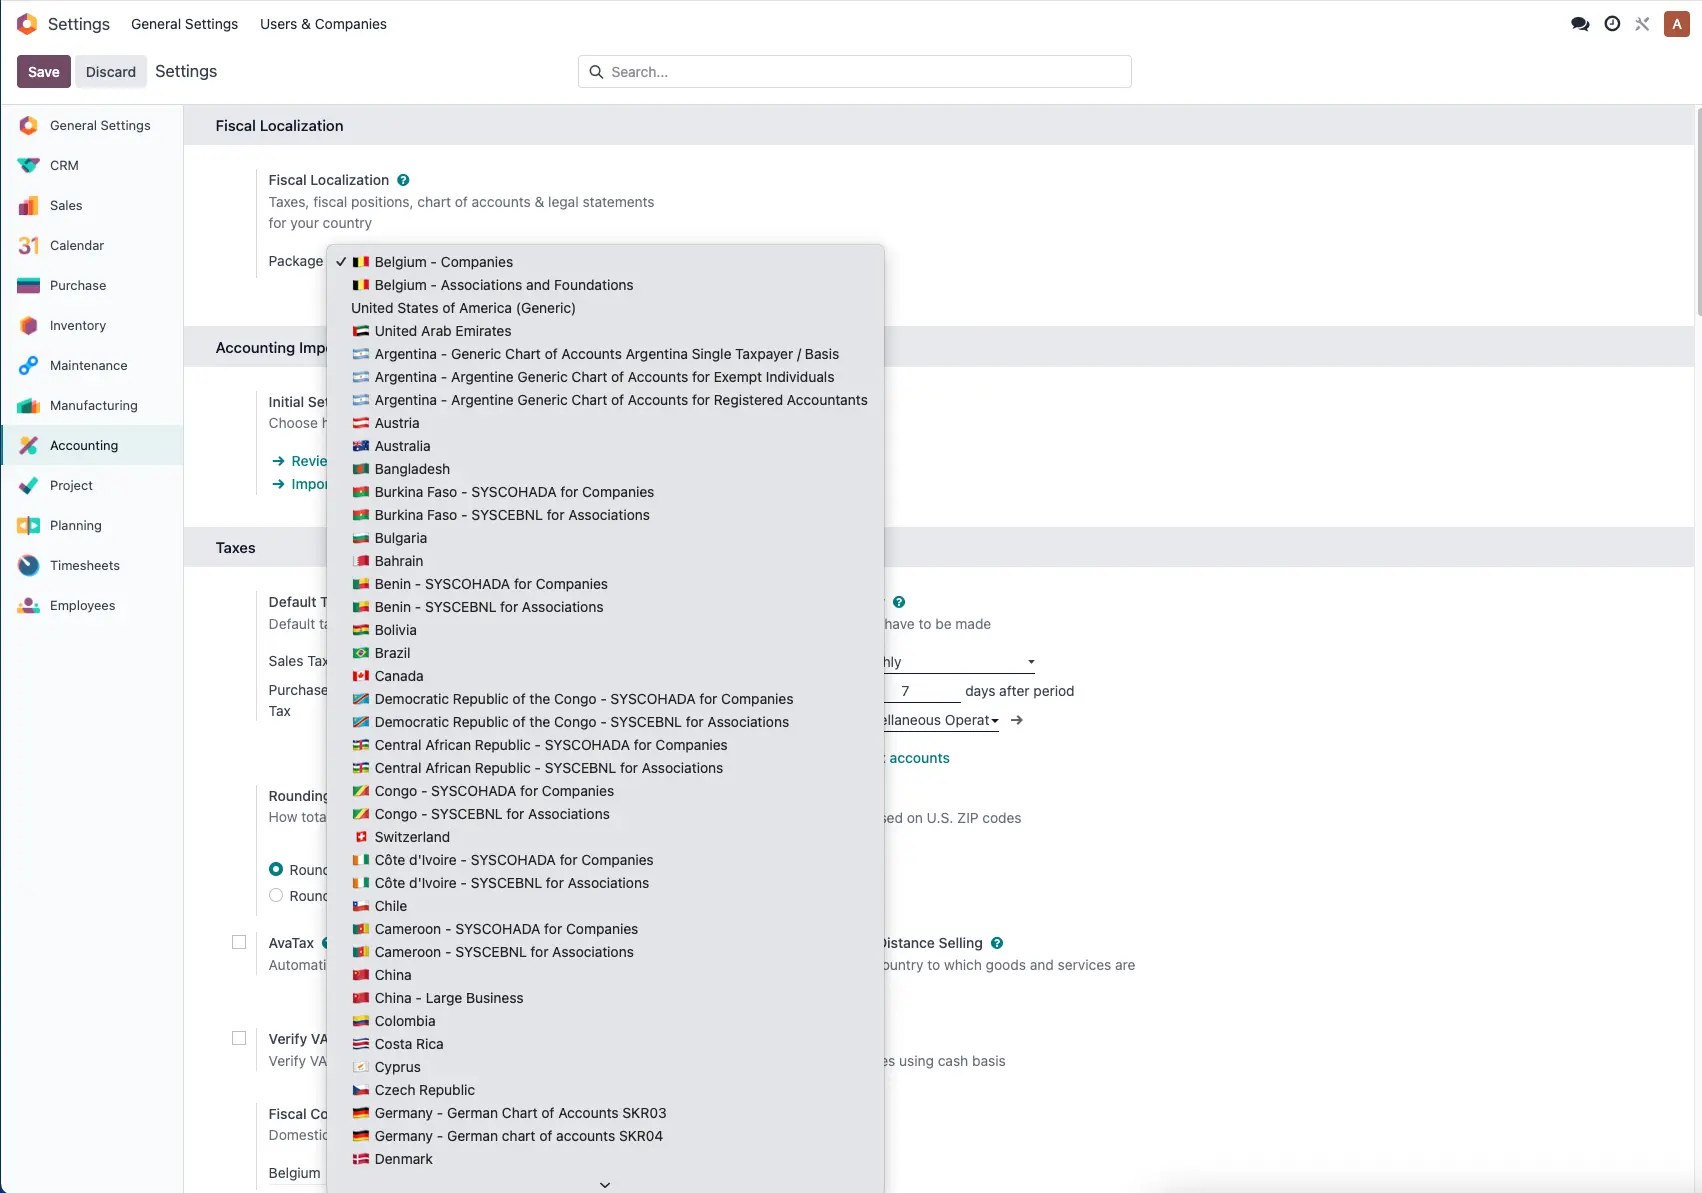
Schritt 1 – Lokalisierungspaket wählen
Gehen Sie zu Einstellungen > Finanzlokalisierung und wählen Sie das richtige Paket für Ihr Land. Damit werden Standardkonten, Steuern und Berichte installiert.
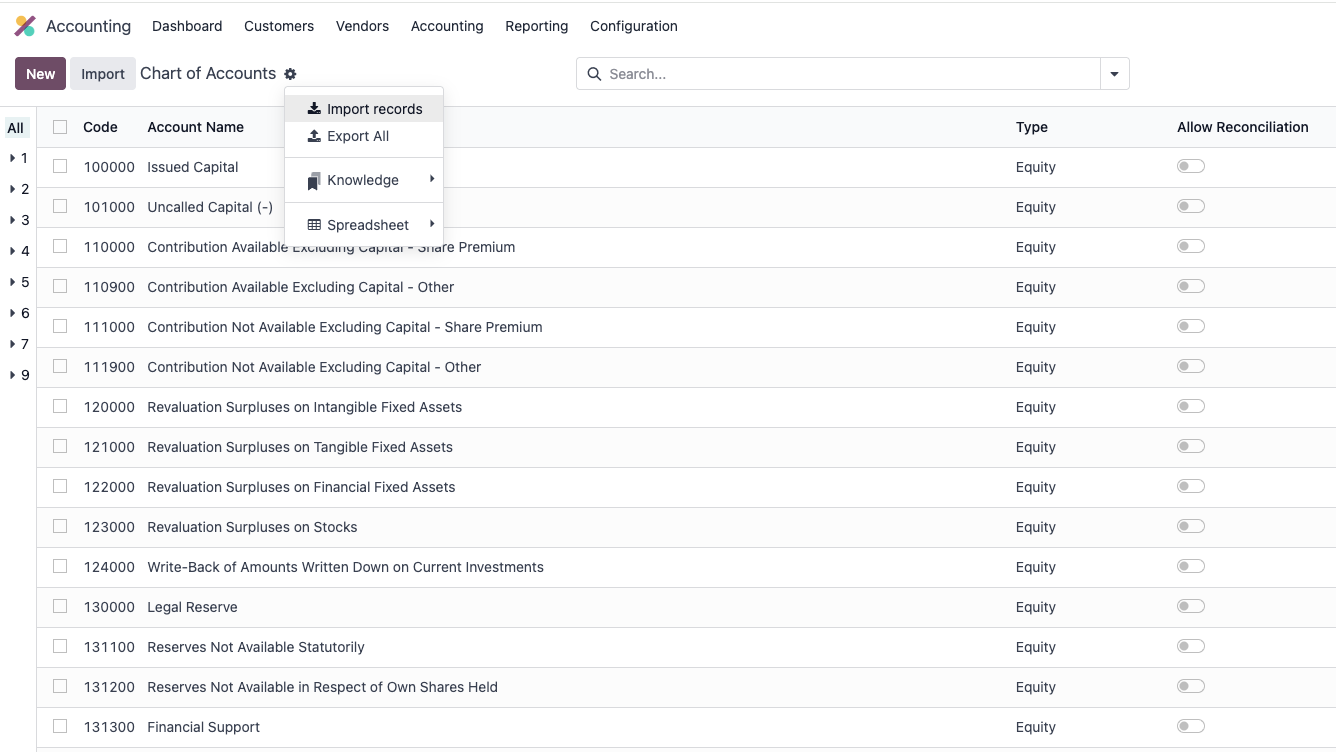
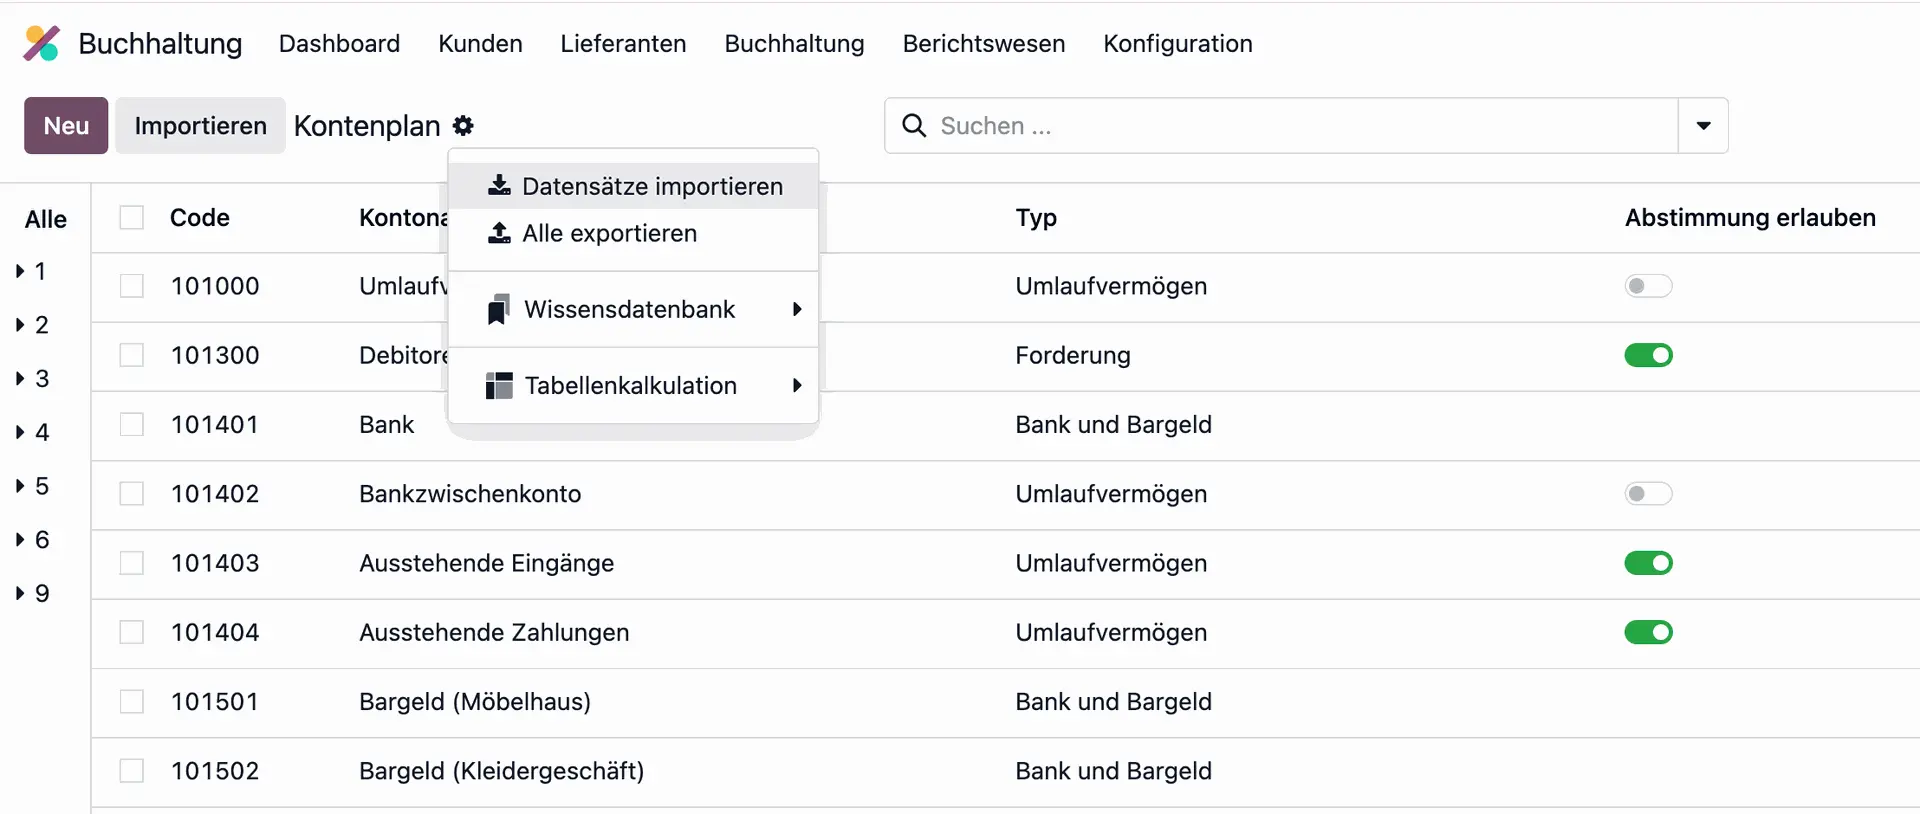
Schritt 2 – Kontenrahmen importieren
Buchhaltung > Konfiguration > Kontenplan. Importieren Sie Ihren Kontenplan per CSV oder Excel und prüfen Sie dabei Kontotypen, Tags und Standardsteuern.
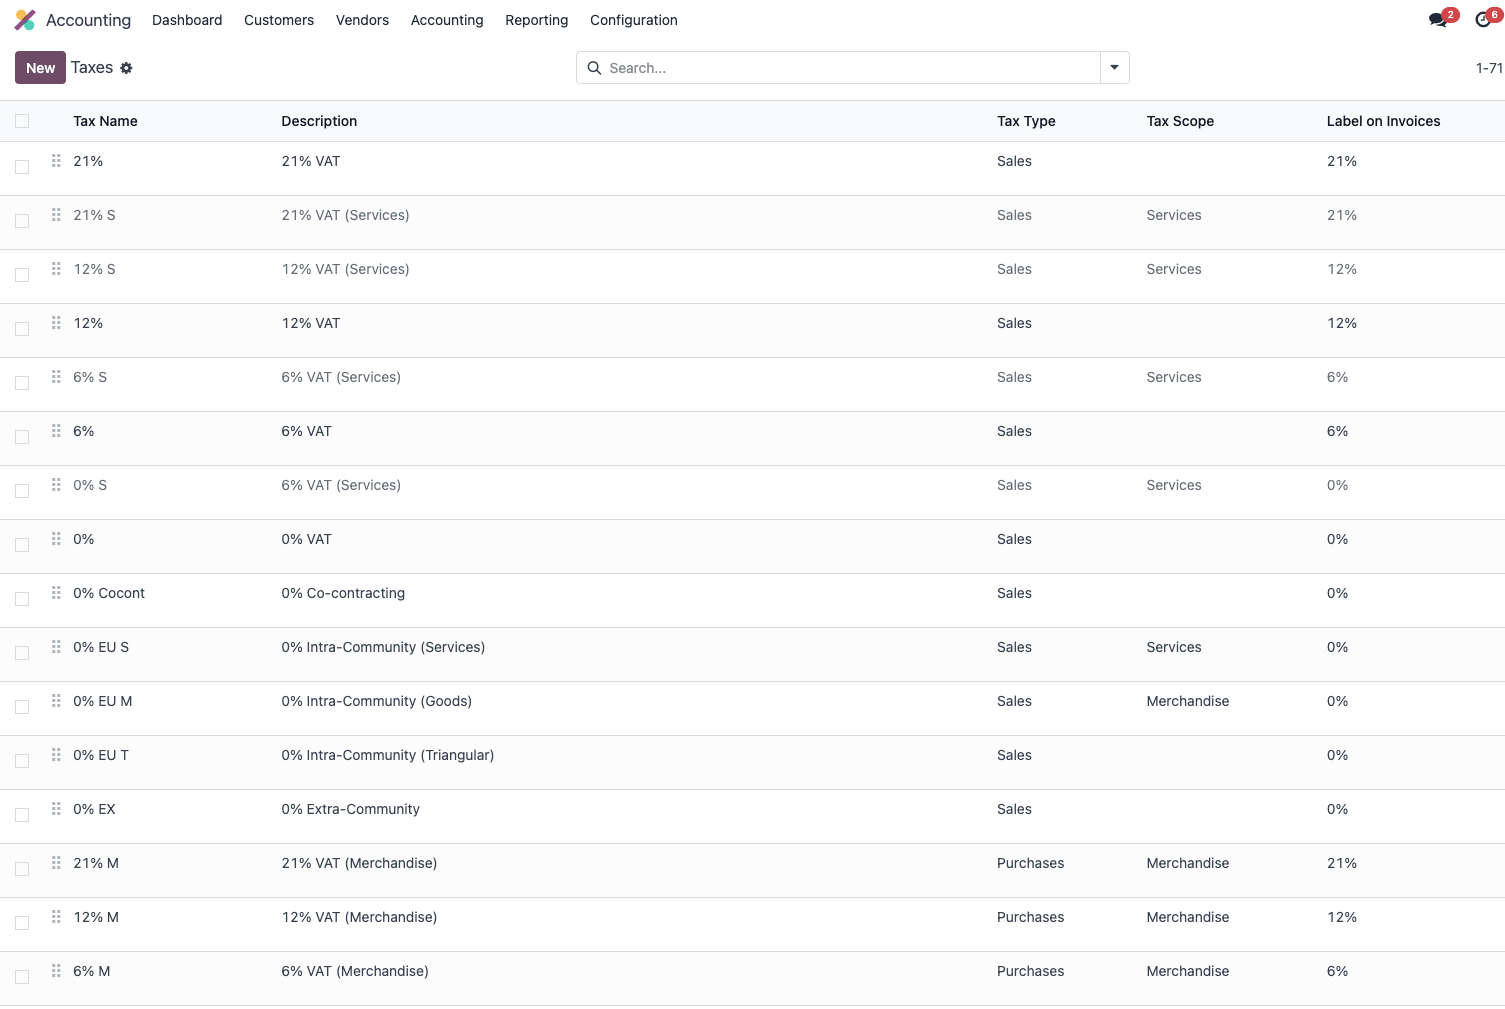
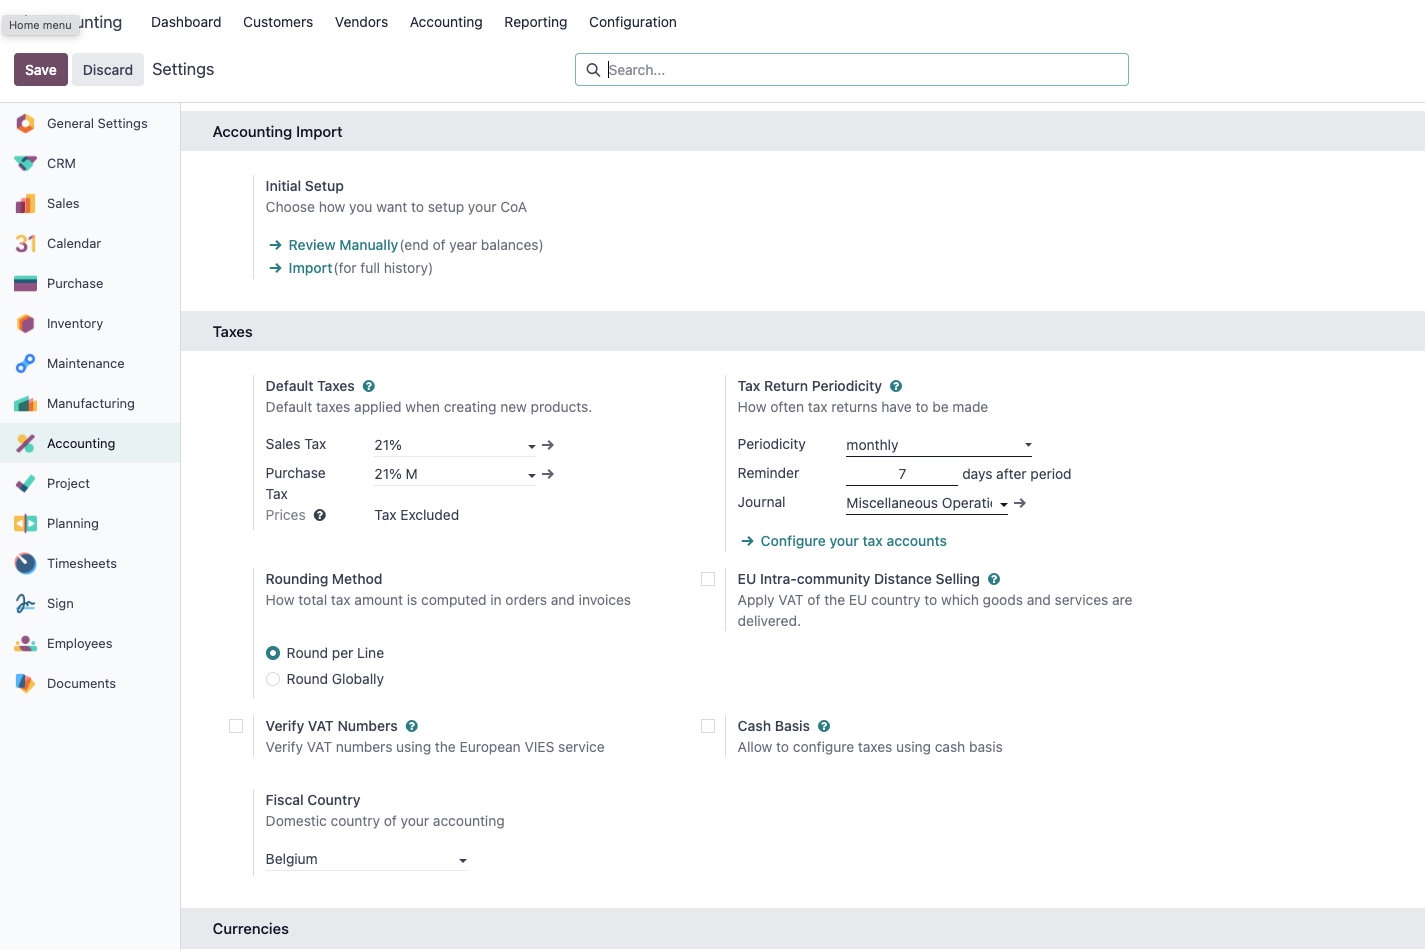
Schritt 3 – Steuern einrichten
Unter Konfiguration > Steuern können Sie Regeln festlegen oder anpassen. Verknüpfen Sie sie mit den richtigen Konten und Steuergruppen.

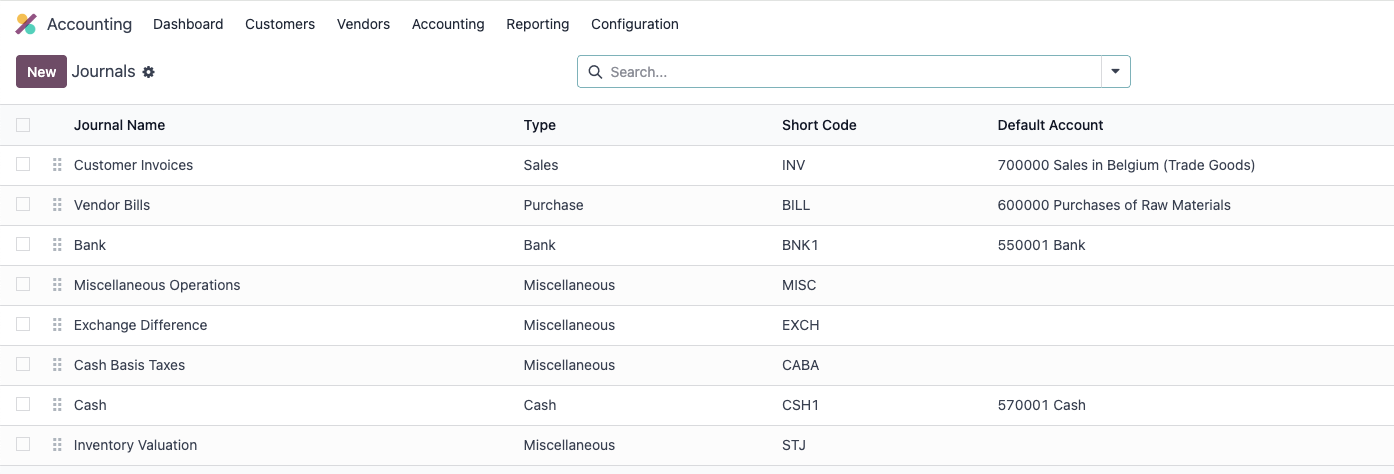
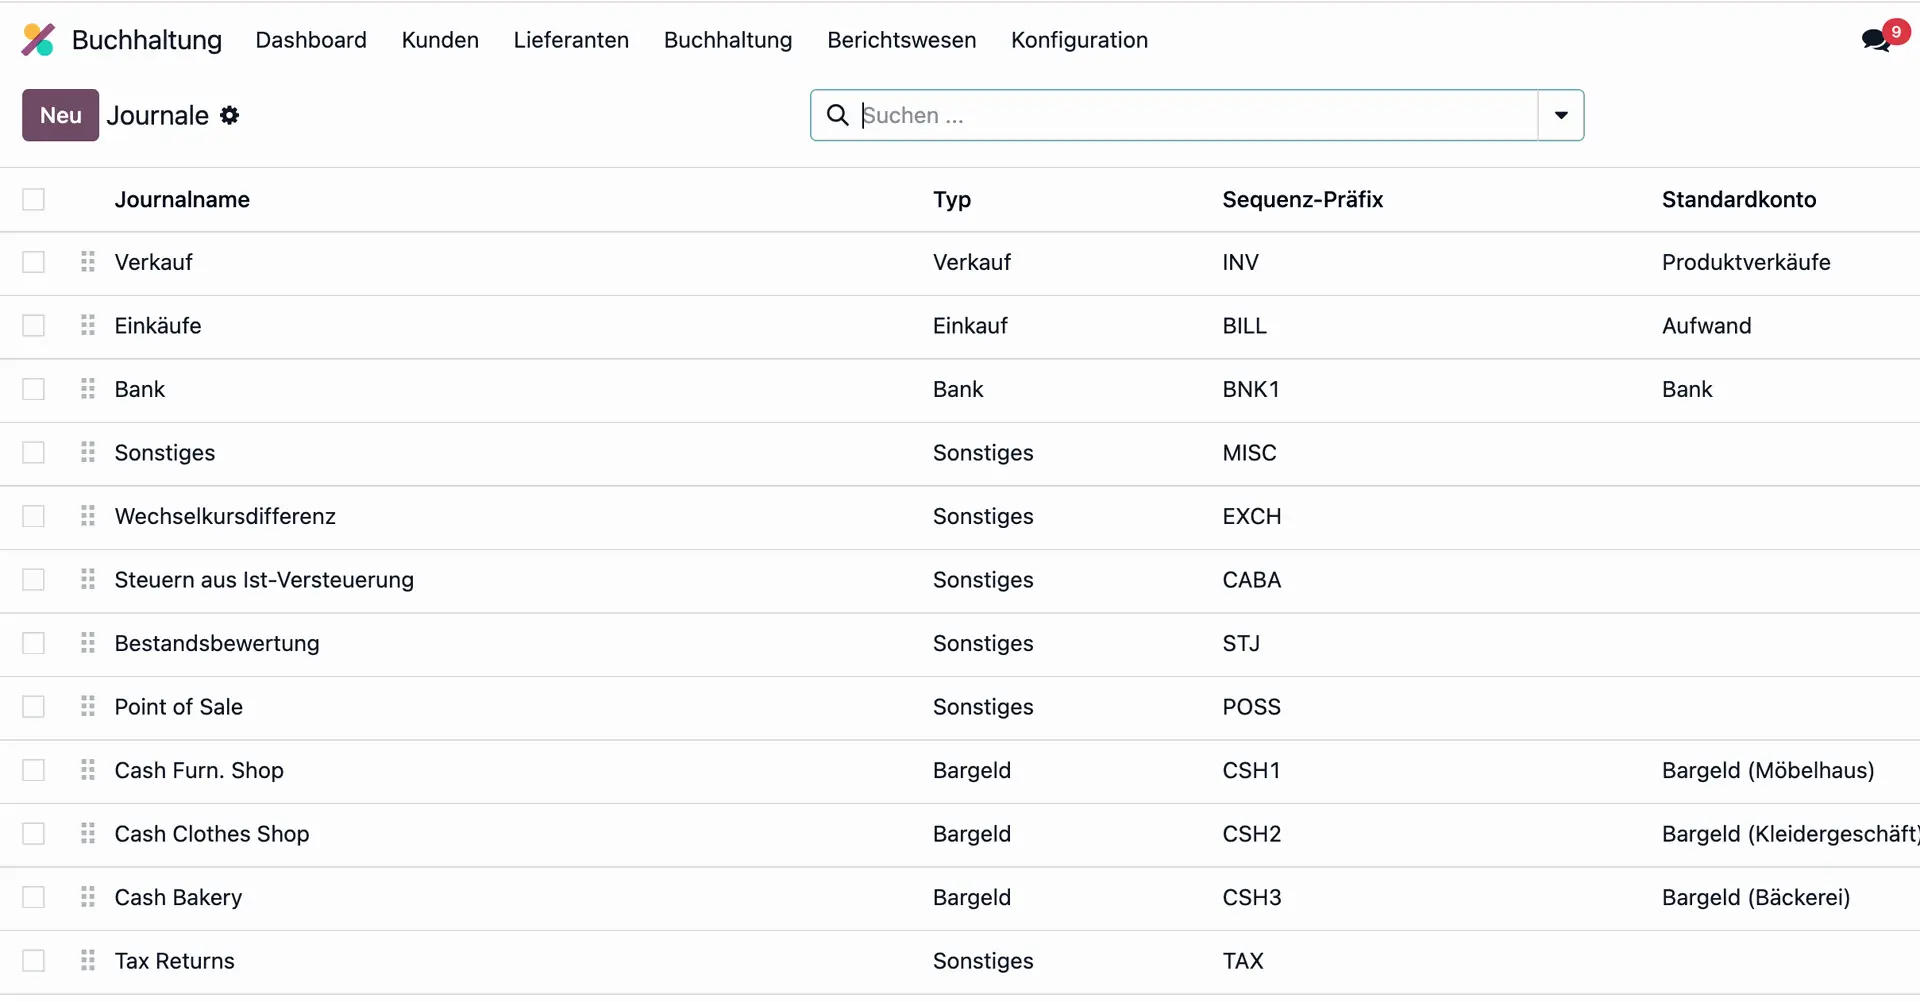
Schritt 4 – Journale anlegen
Definieren Sie Journale für:
- Verkäufe
- Einkäufe
- Sonstige Geschäftsvorfälle
- Jedes Bankkonto (Typ: Bank)
- Kassenbewegungen (Typ: Kasse)
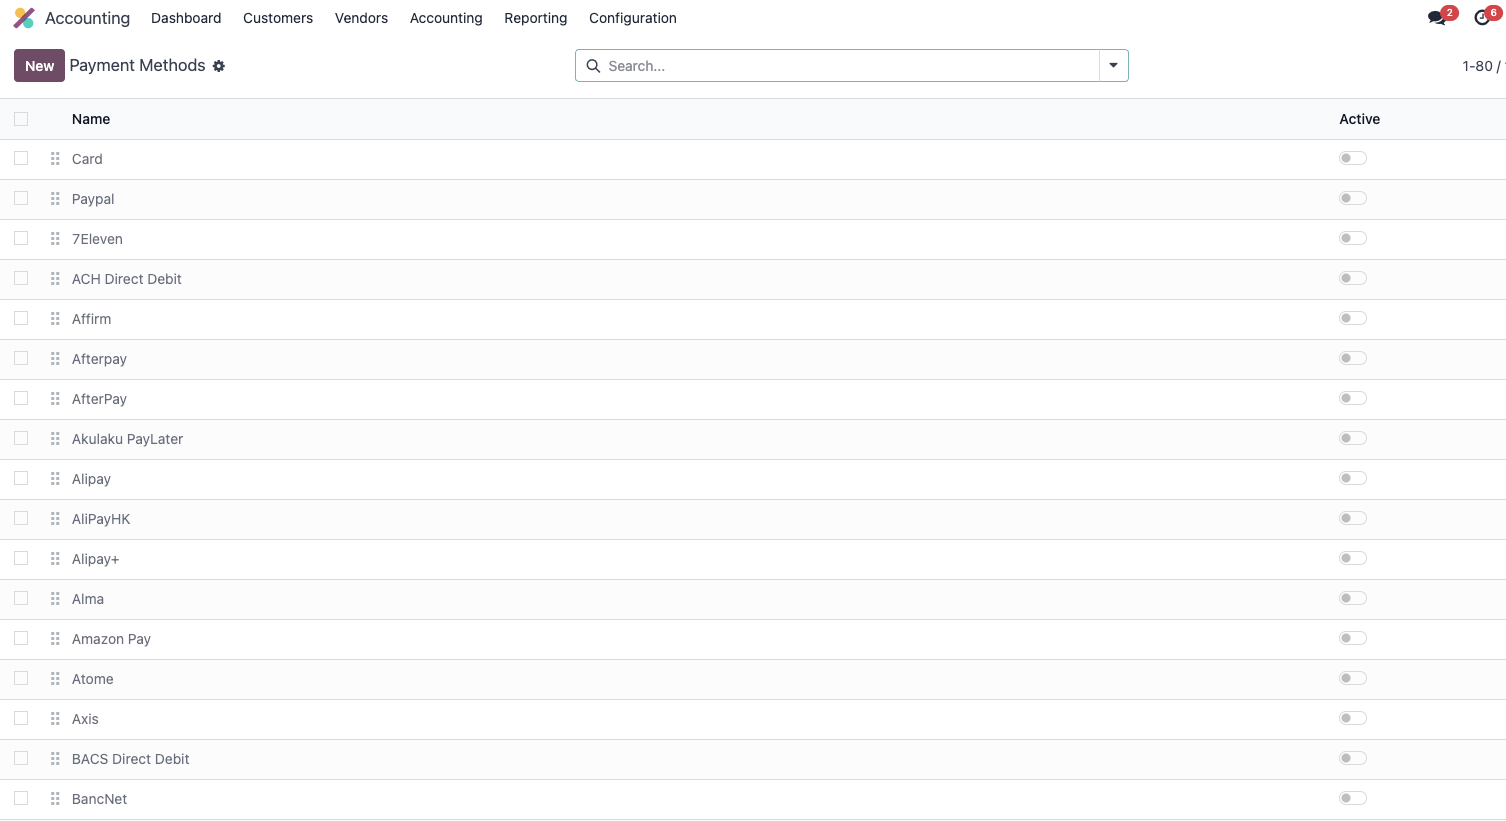
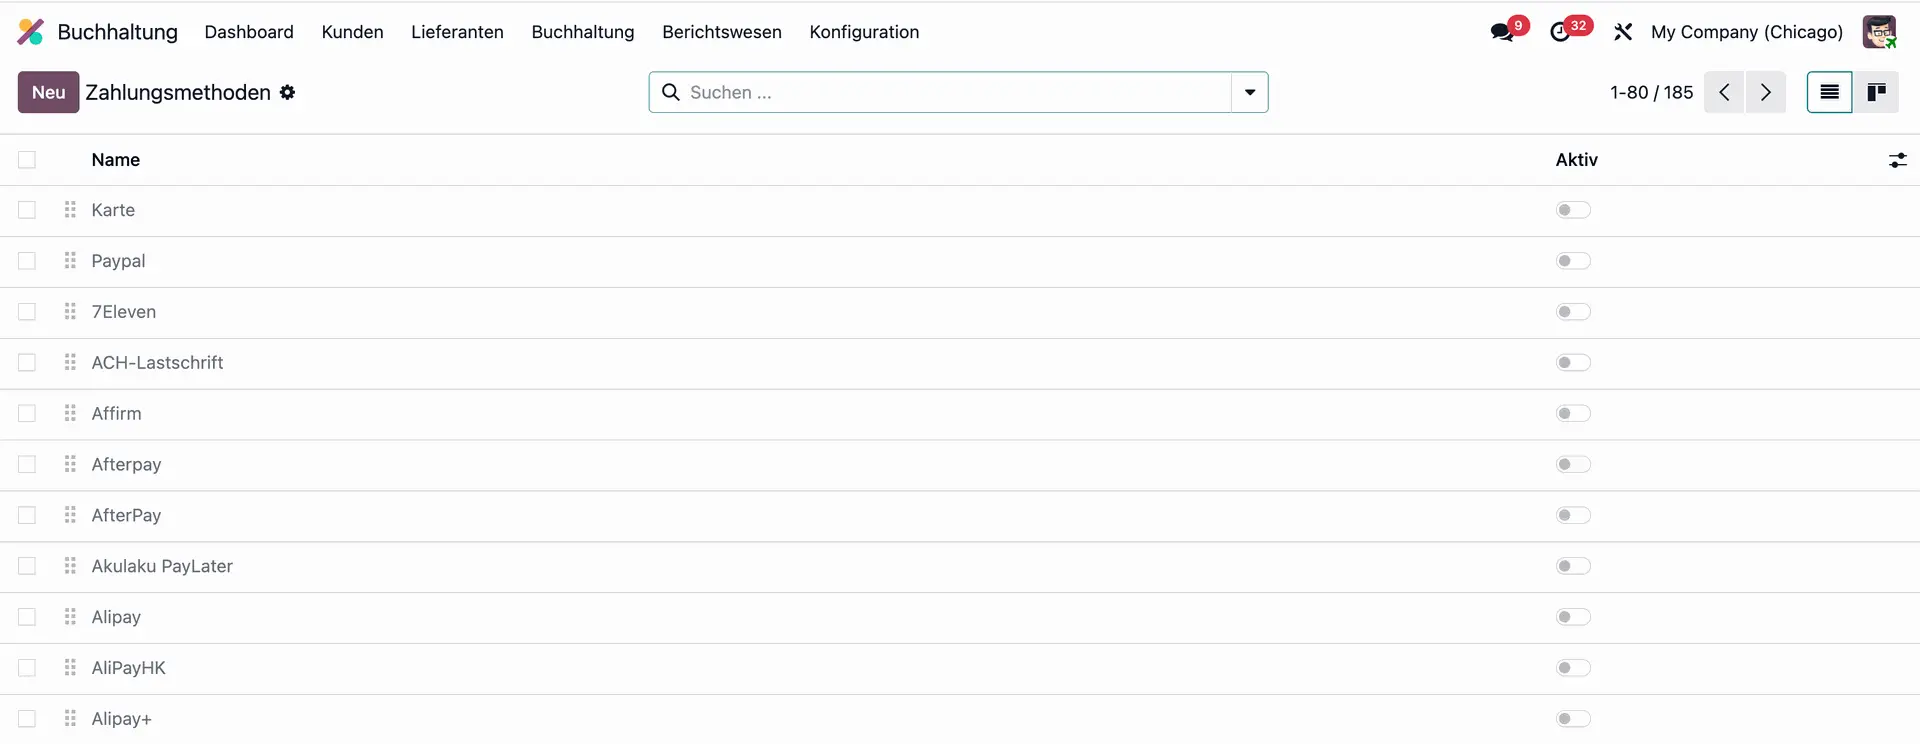
Schritt 5 – Zahlungsbedingungen & -methoden konfigurieren
Richten Sie Standardbedingungen (z. B. netto 30 Tage, 3 % Skonto in 10 Tagen) und Anbieter wie SEPA, PayPal oder Stripe ein (Fakturierung > Zahlung).
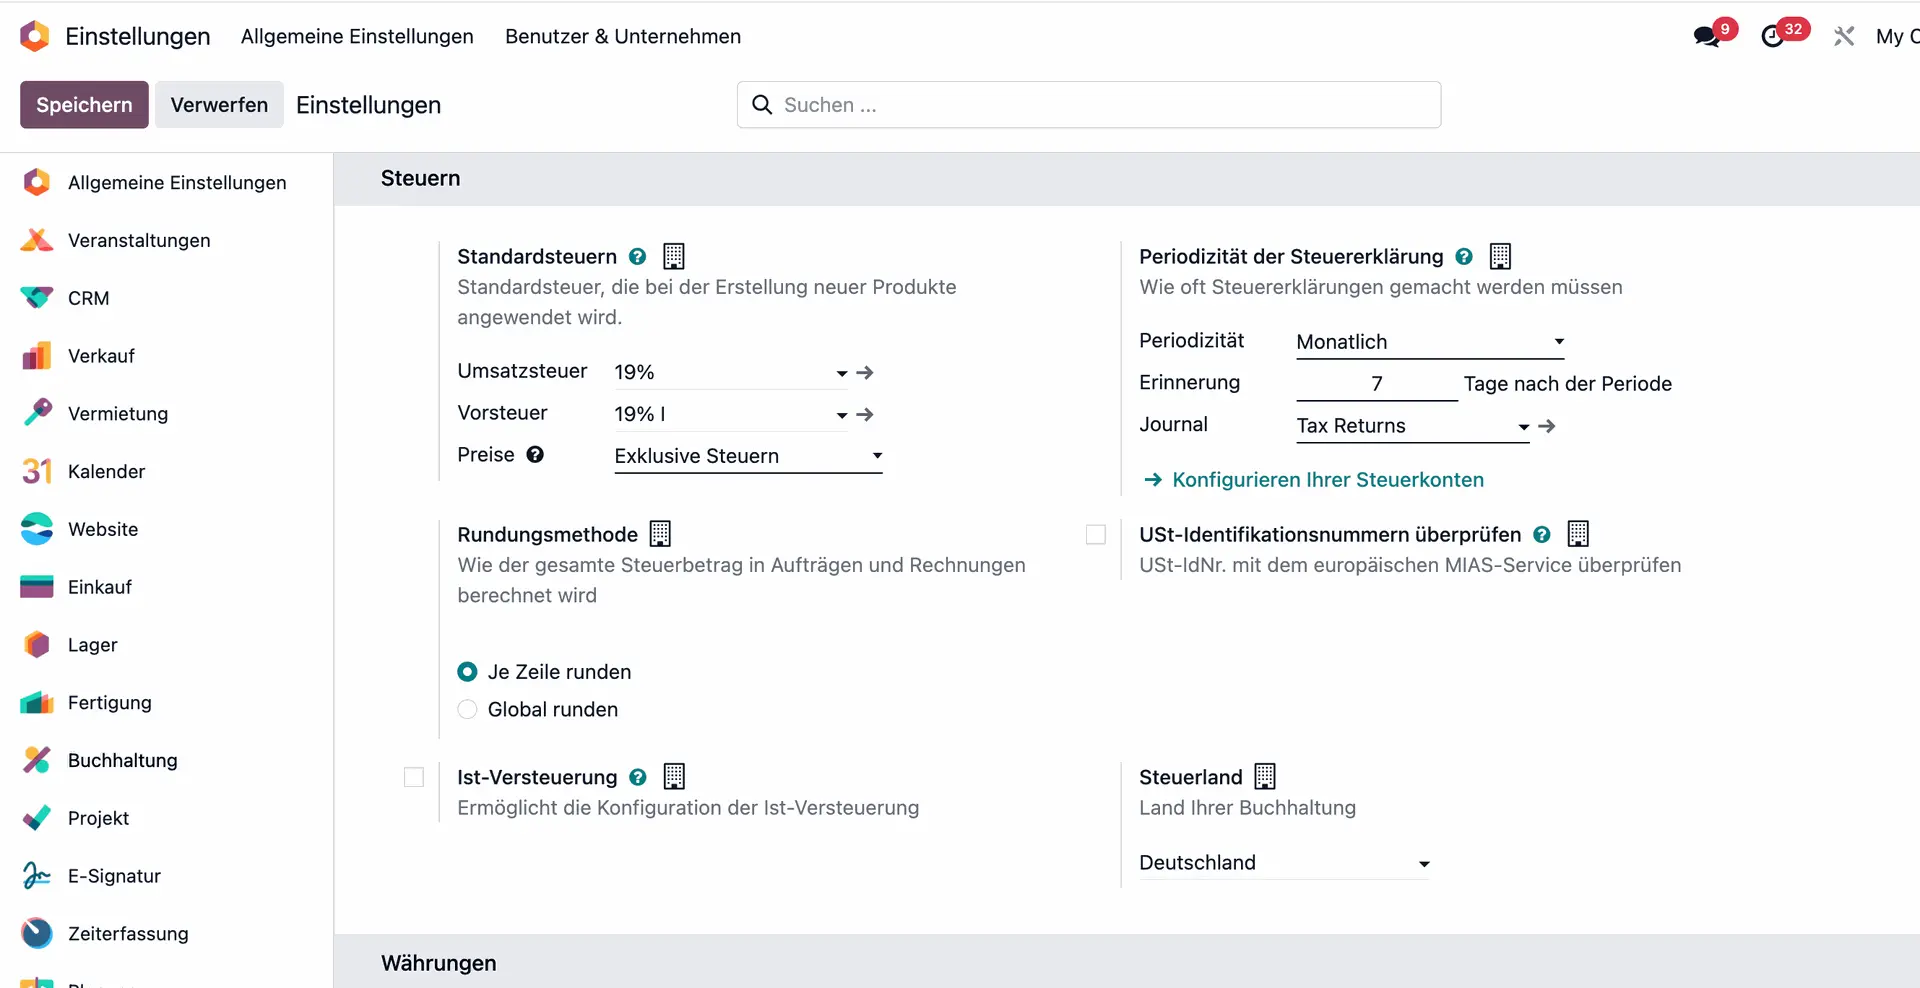
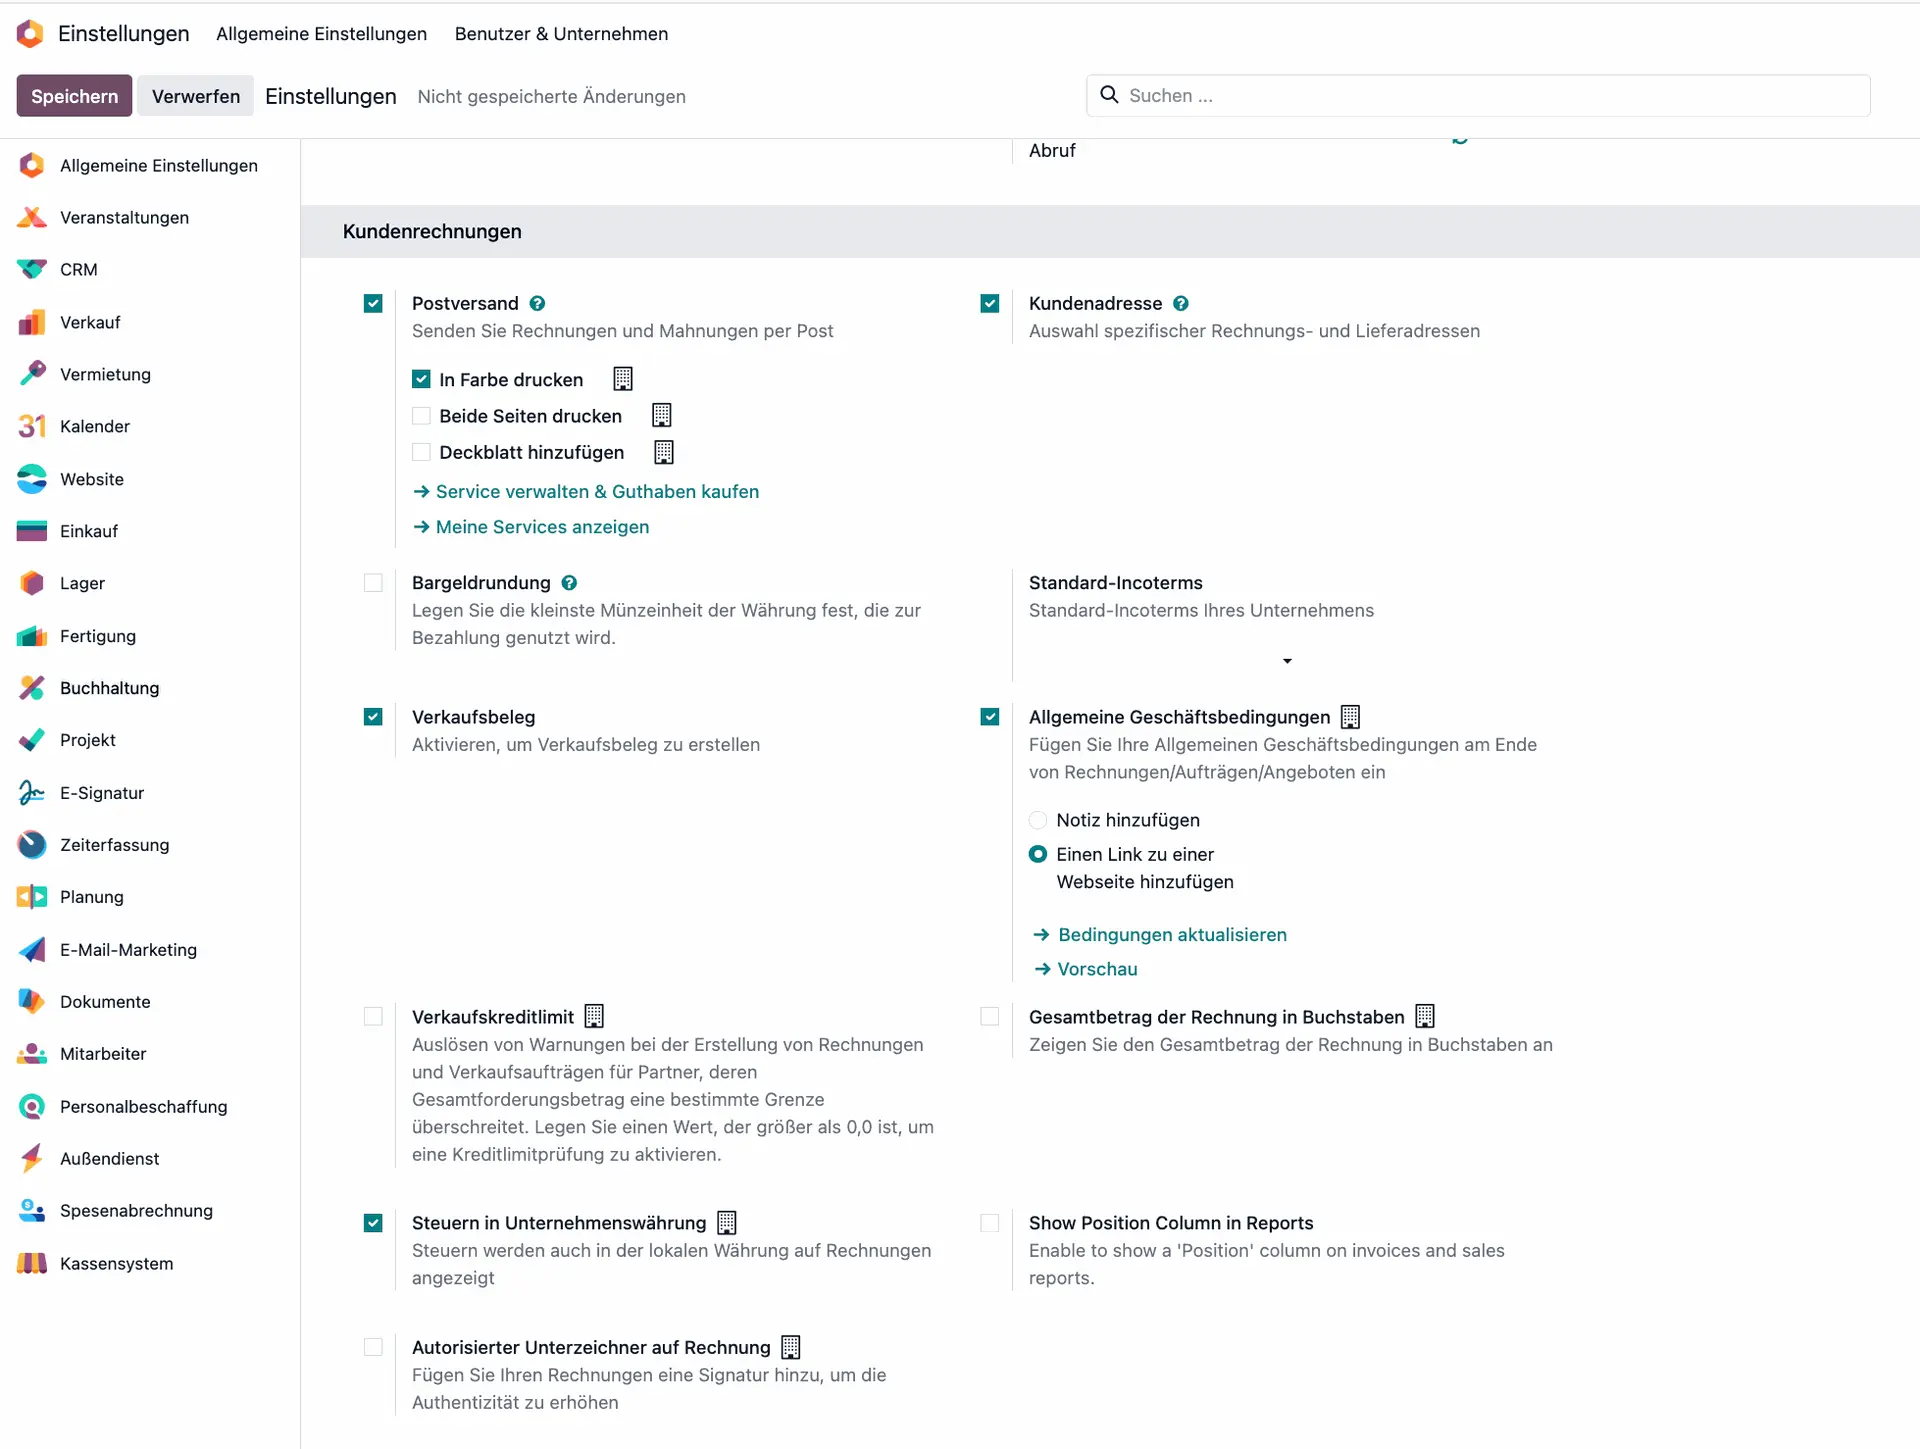
Schritt 6 – Standardwerte festlegen
In den Einstellungen prüfen Sie:
- Standardsteuern für Verkauf und Einkauf
- Allgemeine Geschäfts- und Zahlungsbedingungen
- Standard-Incoterms
- Standardkonten für Gewinne/Verluste, Abgrenzungen, Skonti
Danach können Sie Verfeinerungen wie Abstimmungsmodelle, Anlagenvorlagen oder Kostenstellen hinzufügen.
Wichtige Checks vor dem Go-live
Bevor Ihr Odoo live geht, überprüfen Sie, ob die folgenden Kernprozesse korrekt eingerichtet sind:
- Kontenrahmen: Richtige Typen, Codes, Steuerkonten und Tags für Bilanz und GuV.
- Steuern & Steuergruppen: Alle relevanten Steuern müssen vorhanden, korrekt verknüpft und Berichtsrastern zugeordnet sein.
- Steuerpositionen: Automatische Regeln für Kundenstandorte (z. B. EU B2B, Nicht-EU B2C).
- Journale: Vollständig für Verkäufe, Einkäufe, Kasse, Bank und Lager, mit korrekten Standardkonten.
- Zahlungsbedingungen: Skonto- und Fälligkeitsregeln prüfen.
- Banksynchronisation: Bankkonten verknüpfen, automatische Auszüge testen, Abstimmungsmodelle kontrollieren.
- Währungen: Zusätzliche Währungen aktivieren und automatische Kurse einrichten.
Vergessen Sie nicht, Standardsteuern, Rundungen und ggf. Ist-Versteuerung zu konfigurieren.
Tägliche Buchhaltungsprozesse einrichten
Damit die Arbeit im Alltag reibungslos funktioniert, müssen Sie die folgende Workflows konfigurieren:
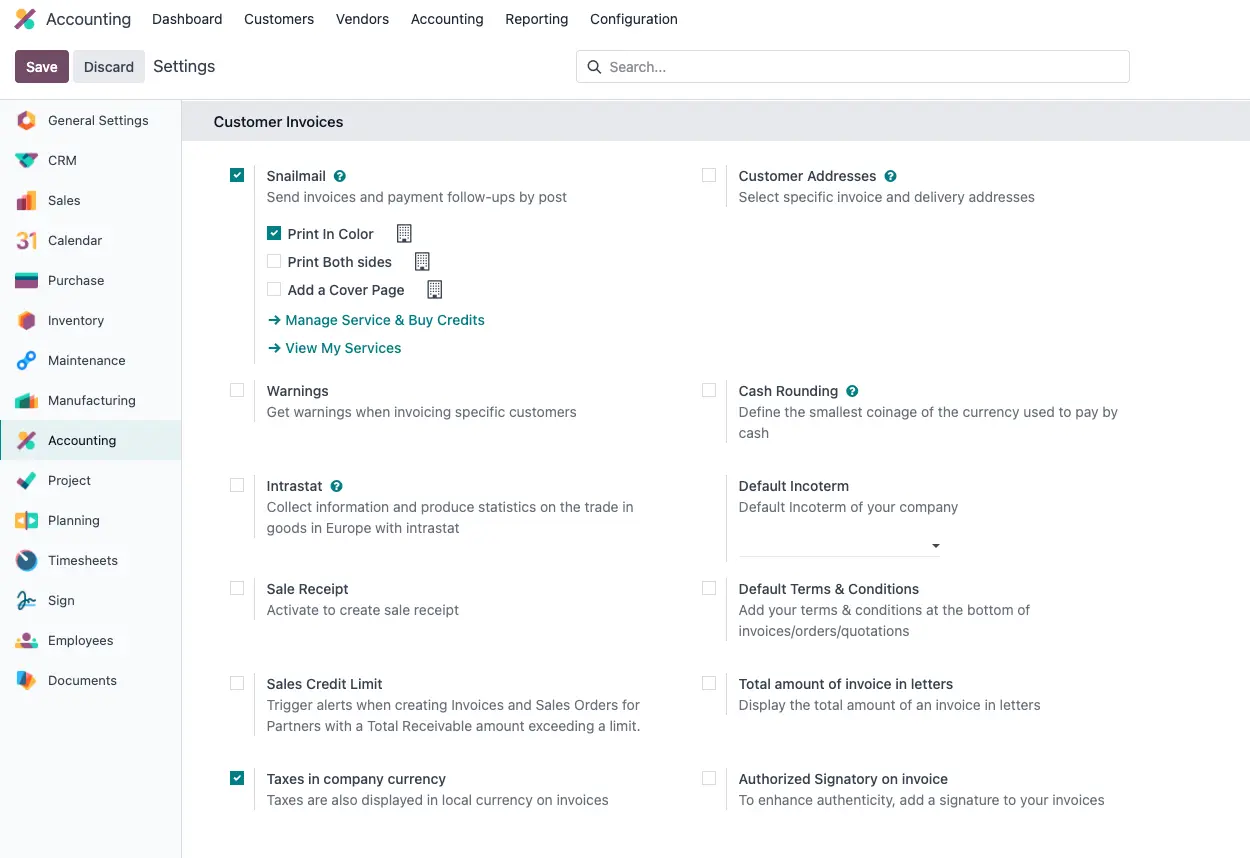
Kundenrechnungen & Zahlungen
Online-Zahlungen aktivieren (z. Bsp. SEPA, PayPal)
Standardwerte für Rechnungsversand und Bedingungen setzen
Kreditlimits konfigurieren.
Lieferantenrechnungen & Zahlungen
Drei-Wege-Abgleich nutzen zur Einkaufskontrolle
Zahlungsmethoden einrichten (SEPA, Checks)
Rechnungsdigitalisierung aktivieren.
Bank & Zahlungsabgleich
Bankfeeds prüfen
Abstimmungskonten und -modelle definieren.
Kostenstellenbuchhaltung
Kostenstellen und -pläne für die interne Kostenverfolgung anlegen
Verteilungsmodelle nutzen, wenn Buchungssätze automatisch bestimmten analytischen Konten oder Dimensionen zugeordnet werden sollen.
Anlagen & Abschreibungen
Modelle mit Dauer, Methode und Konten definieren
Prüfen Sie, ob Abgrenzungsbuchungen oder automatische Abschreibungen erforderlich sind.
Lager & Bewertung
Für Unternehmen mit Warenbestand: Überprüfen Sie Ihre Bewertungsmethoden und Konten.
Aktivieren Sie Zuschlagskosten und legen Sie – falls relevant – Ausbuchungsstrategien fest.
Gesetzeskonform und prüfungssicher bleiben
Eine saubere Konfiguration macht Ihr System audit-ready ohne Zusatzaufwand. :
- Audit Trail aktivieren, um Änderungen nachzuvollziehen
- Kontentags und Berichtsgliederungen nutzen (Bilanz, GuV, Steuerberichte)
- Geschäftsjahr und -Perioden korrekt festlegen
- Lokalisierte Reports aktivieren (z. B. DATEV-Export)
- Zugriffsrechte und Sicherheit prüfen
- USt-IdNr.-Prüfung automatisieren, OSS für EU-B2C nutzen
- Dokumentendigitalisierung einsetzen, um manuelle Fehler zu vermeiden
Bereit für eine saubere Odoo-Buchhaltung?
Eine richtige Einrichtung bedeutet weniger Umwege, bessere Berichte und weniger Stress im Finanzteam. Ob Erstkonfiguration oder Review einer bestehenden Instanz – ein sauberes Setup macht den Unterschied.